Tuesday, May 6, 2014

Challenge #8 UFO Complete


The Challenge: UFO Unfinished Object
Fabric: Green cotton velveteen, cream shiny poly something, trims.
Pattern: Started as a Margo Anderson Pattern in 2009ish
Year: 1560's
Notions: metallic copper trim, black velvet trim, black ribbon
How historically accurate is it? All modern materials and hand sewn 
Hours to complete: completing sleeves only took maybe 5 hours once I got started.
First worn: haven't worn yet
Total cost: nothing, all from stash and was sitting unfinished
I wasn't able to get a really good picture, I realized that I don't have any hoops to wear this over to show off the gown shape. So I took a pic of just the newly finished sleeves. Now I have a potential loaner gown for friends who may need something to wear to faire. 

Monday, April 28, 2014

Challenge 8 Half Way There


Slow progress, but progress none the less. 
The sleeve panels are now sewn together. Now to connect them and figure out how to attach them to the gown. I took her out of the garment bag that it's lived in for 2 years and put it on the dress dummy. I don't even have hoops anymore. One of my future projects on this fortnightly adventure. So the skirt is just hanging on the dress dummy mocking me. This challenge is more difficult than I expected. I think I like the idea of just stuffing things in a box and forgetting about them if I don't like them. But I am determined, I am going to finish it and then maybe I'll just give it away or sell it, or keep to loan to the inevitable faire friend that has nothing to wear. 

Friday, April 25, 2014

Challenge #8 UFO UnFinished Object

I have a box of unfinished projects, I hate opening the box and reminding myself of those projects. But here is the next challenge and I have at least one project that I really should just finish up. 
My Florentine Gown from 2009.
I dove into this gown with a gusto. I researched and sewed my heart out. Then I kind of ran out of steam. I found that the skirt ended up slightly crooked, then I really got lost when I needed to move and I had not completed the sleeves. I wore it to a ball with out the sleeves and briefly to a Renaissance Faire, then into the box it went with every intention of being completed. 
Then life happened and I pretty much did not sew for almost 2 years. I attempted to take it our in 2013 but ended up still not completing it. 

So what does it need? Sleeves for the main gown. That's it. 


Here it is while it was in progress. My very first dedicated sewing area too. 
This makes me happy.

One problem that I am having is that my skill level has changed so much since I started it, I just don't know if I like the gown anymore. But right now the sleeves are cut and pinned, just needing to be sewn together so I am going to work on this and get it completed. Then I can move on. 

Once I have the gown itself completed then if I still have time left in the 2 week challenge I will complete the partlet and caul to go with it. At the time I even bought an ermine to stuff and decorate as an accessory. 

Wednesday, April 23, 2014

Tops and Toes: An Easter Bonnet


The Challenge: Tops and Toes
Fabric: Buckram, silk taffeta, and cotton velveteen
Pattern: Miller's Millinery Portfolio Pattern BEBE BONNET
Year: 1870's
Notions: Millinery wire, silk flowers
How historically accurate is it? 70% maybe
Hours to complete: Maybe 10, it actually went together rather quickly
First worn: April 19, 2014 Old Sacramento Easter Bonnet Promenade
Total cost: Everything was from my stash except for the flowers which I purchased for $1.00 

For the Tops and Toes Challenge I decided to make a bonnet to go with my bustle gown to wear to the Annual Easter Bonnet Promenade in Old Sacramento. 
Step one research:  I have discovered Pintrest and I love it! I spent several hours researching 1870's bonnets and found the mini one that would sit on the back of the head as a good one for me to be able to actually make. 
Step 2 a pattern: I found a pattern at Miller's Millinery for a Bebe Bonnet.
Step 3 Construction: 

Carefully cutting the pattern pieces and then the buckram. Using sharpies to mark isn't a problem since all of the buckram will be covered.


Sewing the pieces together then adding the wire along the edge.


There were 3 main pieces to put together. I used a heavy quilting thread and a strong needle to get through the layers of buckram.


Next step was adding the fashion fabric. This involved a lot of pinning to keep the fabric smooth and tiny little stitches so that you can't see.


Brim from the back.


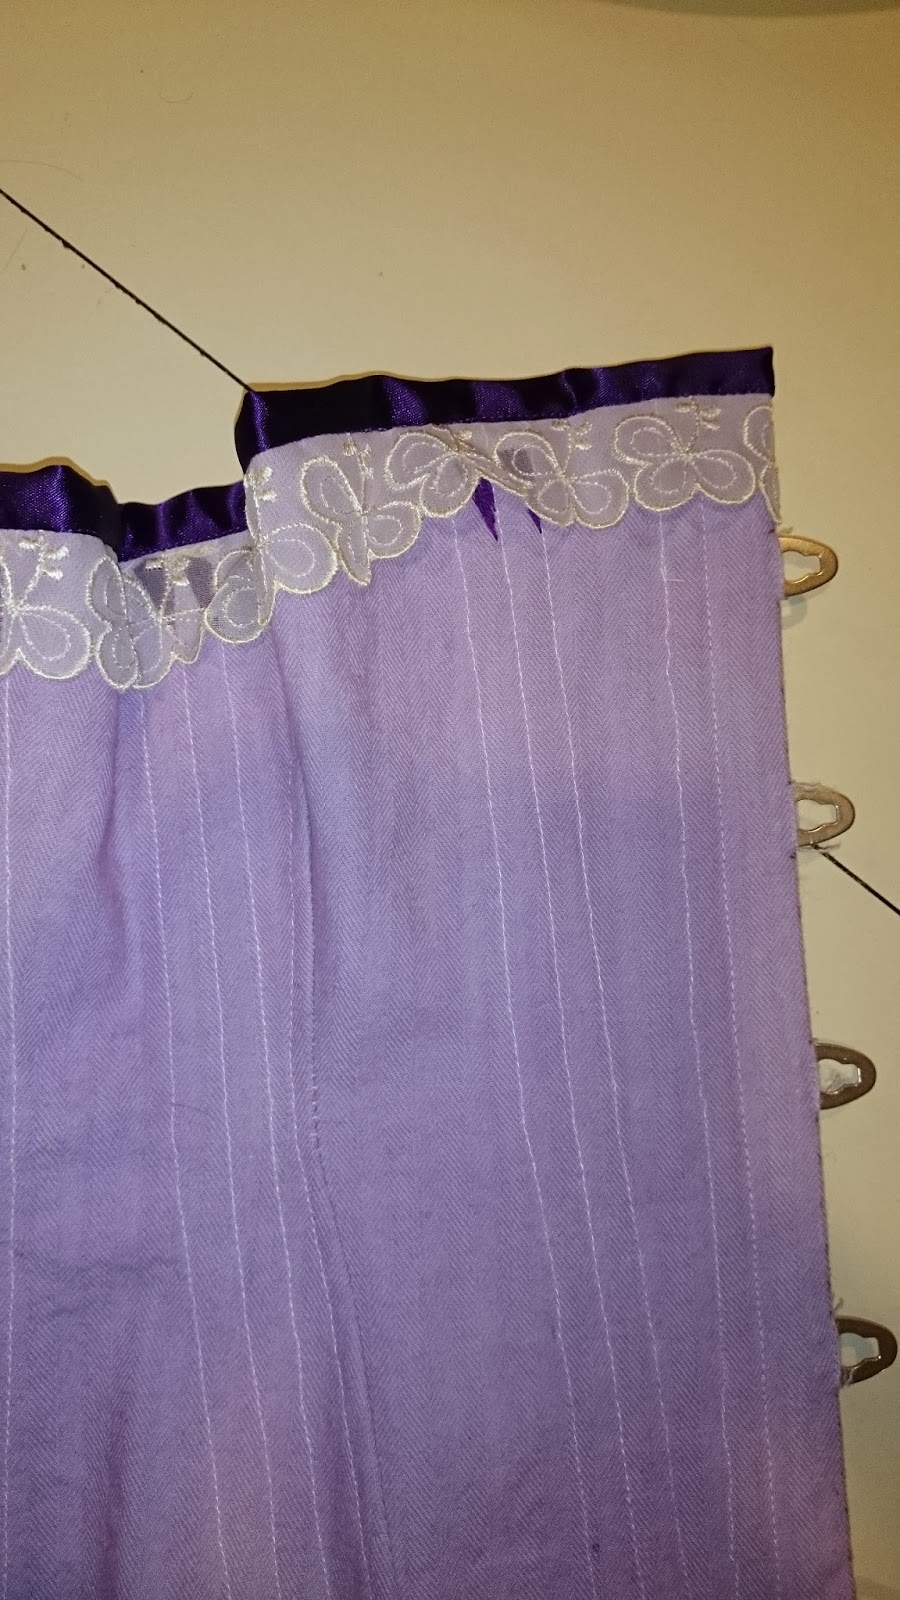
I actually enjoyed adding the front piece, once it was sewn along the outside I had to make cute pleats to attach it to the back on the inside. 

Add some flowers. For the time period that I was going for a lot of the decoration was in the inside of the bonnet. I was trying to stick with a budget so I used the flowers I had rather than buying more appropriate ones, but I like how it turned out. 


And to tie it more into the gown I added a bit of dark velvet trim. 

Ta Da!! My first bonnet!

Wednesday, March 26, 2014

Challenge 6: Fairytale- Skipping This One

The next Challenge due April 1, 2014 is Fairytales. Lot's of fun ideas have come up but I have just not been able to find inspiration. So I've decided rather than force something, I am going to work on a different project. 
I plan to attend a Titanic Themed Tea in April and I really need something to wear.
So for these two weeks I will be creating a 1912ish tea gown. Here are some inspiration gowns.

 I love the tiers on this one along with the very feminine pinks.

 This one is more the actual style I am going to go for on my own gown that I am working on. 

These would be fun to play with, however I just won't have the time....

Step 1. Fabric choice: I had some lovely lace and embroidered curtains, I also owned a kitten, these two things did not mix well. So I took the curtains down and saved them, just in case.. It is the lace curtains that will be the over bodice and over skirt. I don't have enough that is not shredded to do more than one layer so my over skirt will be one layer. For the under dress I was determined to not buy new fabric but to use my stash. I found a little over 3 yards of some off white poly satin. Yuck I hate poly now, but at least it will be out of my stash and it should look the part. For the sash I found some dark green shantung. Voila, an idea. 


Step 2. Pattern choice: Well I have the infamous Titanic gown pattern from Simplicity and no time to order a new one so I will be practicing my altering abilities. 


Step 3. Finding the time: So far I'm chugging along. Megan thinks it's hilarious to sabotage my cutting attempts. I have also decided that the portion of my sewing area that I have for cutting is just too small, time to bring my smaller sewing desk up and to use the large table for cutting and detail work. 

Saturday, March 15, 2014

Challenge # 5 Bodice - Completed


The Challenge: Bodice
Fabric: Silk Taffeta and Cotton Velveteen
Pattern: TV 405 Vest Basque
Year: 1872
Notions: Buttons, thread,
How historically accurate is it? 70%
Hours to complete: 15?
First worn: Planning to wear to the Easter Bonnet Promenade
Total cost: All from stash
Finished the buttons last night. I am happy to have completed this within 2 weeks. I will have to look at adding more details later but for now it looks pretty good. Here are a couple more pictures. I need to iron the skirts and I will need a correct petticoat. It doesn't fit well on m dress dummy but that's okay when I wear it I will get some pictures then. 
Side view of completed outfit.

Definitely need to add a bottom trim or ruffle. 

Friday, March 14, 2014

1870's Bodice, Almost There

I ended up working over a weekend so I took a week day off from the day job to relax. My day was spent pretty much sewing and watching Merlin. The results are that I may just finish this Challenge in time for the deadline which is tomorrow. 
Here are some progress shots. 

 Front view. I practiced my button hole feature on my machine for almost half an hour to make sure I got these spaced properly. I actually do like how the dark velvet plays off of the lighter silk. My one regret is that with the time restraint and my attempt to use stash items as much as possible I really didn't do any embellishments like I would like. I may go back late and add details to the collar and cuffs at least. 

 Back view. I am liking the tail. I need to put the skirt and bustle on my dummy to see how it will actually look though. 

Side view. I may make this pattern again and change the design of the bottom, I think it could be made to be a lot more fun over all. 

Since taking these pics all I have to do is the hand sewing including the buttons, so my Friday night is going to be split between time with my family and time with my sewing. Looking forward to posting the entire outfit. Then all I will need is a proper bonnet or hat.

Thursday, March 13, 2014

Vest Front Bodice Progress

This project has been pretty slow going. Between running out of canvas for interlining, discovering that I don't have any boning in the sizes that I need, and just constantly being interrupted I am surprised that I am making progress at all. 
Here's the basic body, luckily it fits. 

 Front view, it's on my dummy a little crooked. 

Back view. I do love the back details. 
As with most of the Truly Victorian Patterns, this one is coming together fairly easily. I just finished up the sleeves and I do think I managed to make them in such a way that they don't actually match what the pattern called for, but they still look pretty good so I'm going to leave them. I just don't have time to fix them if I'm going to actually complete this challenge on time. 

Monday, March 10, 2014

Challenge #5 Bodice Planning Phase

Challenge #5 Bodice had many possibilities for me. 
Should I finally make my new 16th century bodice? 
What about a ballgown bodice? 
What events do I plan to attempt to make it to this year? 
Well I am planning on attending the Easter Bonnet Promenade again this year in Old Sacramento. My mother in law is very involved and it gives her an opportunity to show off her grandchildren.
So I have decided it is time to complete my Bustle ensemble. 

Here is the skirt and Apron that I have so far, now I need an appropriate Bodice for a Promenade.

I chose another pattern from Truly Victorian TV405


I wanted to do the main part of the bodice in the dark velvet, however I used most of that fabric for a pirate coat and pants for my son when he was about 12. So I fell down the rabbit hole that is Pintrest in order to justify the darker color for the vest portion and the lighter color for the body portion. Here are a few of the pictures that I found that I loved!

  Towson Univ. Dep't of Theater Arts 1870

Dress ca. 1880 From the Bunka Gakuen Costume Museum

Mine won't be nearly as lavish, but it's going to be fun to make and fun to wear. 

Tuesday, March 4, 2014

Challenge #4: Under it All


The Challenge: Under it All
Fabric: Linen
Pattern: Diagrams from The Tudor Tailor
Year: 1500's 
Notions: Thread 
How historically accurate is it? 80% machine sewn and poly cotton thread
Hours to complete: 6ish
First worn: not yet
Total cost: Everything was actually from my stash

This is my second time making one of these square necked smocks and I still managed to make the neck hole to big so I had to fix by pleating in at the corners. It did give me some practice at the box pleating for the sleeves which I plan to use again with another piece in the near future. 
This project didn't get a lot of attention but at least I still made the challenge. The next couple challenges are bigger and I'm hoping I can keep up.

Wednesday, February 12, 2014

Challenge #3: Pink - completed


The Challenge: Pink
Fabric: Pink cotton
Pattern: Buckaroo Bobbins Frillies 4 out of 5 stars
Year: late 1800's
Notions: Lace and a drawstring
How historically accurate is it? Sewn on a machine so %80
Hours to complete: 5 of 6 total although spread out over many days. Lots of time pinning...
First worn: To try on. I found they are a little long, so I may add a few more tucks to shorten just a bit. 
Total cost: Pattern was left over from a project several years ago. I did buy the fabric because I had nothing pink. Lace and drawstring from my stash. Total $14.45

Detail of pin tucks, lace, and ruffle

Thursday, February 6, 2014

Challenge #3 - Pink, Planning Phase

Actually completed 2 challenges so far in the Historical sew fortnightly. And have worked out a nice little system for sewing with Miss Megan. One problem with this challenge, I don't own any pink fabric. I thought I did, I was sure I owned some peach almost pink linen so I tore my stash apart. I finally found it and it was much closer to orange and using it felt like cheating. In my memory I have some lovely burgundy velveteen with ity bity white flowers on it and I briefly considered using it to make a Spencer. I eventually decided against that project for now. So boxes and boxes of fabric and only a few scraps here and there of ugly pink satin to show for it. So I decided to go to my list of things that I absolutely would like to add to my costume collection this year. 
Finally I decided upon new bloomers. Not just any bloomers though; Fancy, Frilly Bloomers. So once again I actually bought fabric instead of using my stash sigh... These bloomers are part of my concept for my Fairytale project as well.


Luckily for me, this pattern is super easy, so hopefully I can just get through this challenge and move on the next one which also involves underwear. I am really hoping to have a full set of Victorian underwear pretty soon. It's going to be pretty difficult to make any other Victorian pieces until I have the proper foundations. 

Tuesday, January 28, 2014

Challenge 2 Innovations: 1910 Corset Completed


The Challenge: Innovations
Fabric: lavender coutil
Pattern:  Reconstructing History 1910's Corset 2 out of 5 stars
Year: 1910
Notions: Purple Satin Ribbon, 1/4 inch steel boning, 1/4 white bias tape, 1/2 inch purple bias tape, vintage lace, 10 inch busk
How historically accurate is it? 85% ? 
Hours to complete: I have no idea, almost 2 seasons of Once Upon a Time and many many interruptions.
First worn: For photo shoot

Total Cost: Approx. $50 including the coutil and boning. I bought everything for this at the beginning of 2012 so it doesn't seem fair to say that it was from my stash even though my materials did sit for almost 2 yrs.


Back view.  I only used 5 yards of lacing, I'm going to re-lace with a longer piece before I officially wear this. My husband took the pictures, I think he missed the concept that the picture is about the corset, not about me. There are a lot of projects coming up where he can learn though...


Princess Megan does not approve of Mommy getting pictures taken while not holding her.


Sunday, January 19, 2014

1910 Corset Construction

After making changes to my mock up and trying it on again I cut into my actual fabric. I still get a slightly panicky feel when I make that first cut.


I made some serious adjustments to the pattern to give more room in the hips and to take out all of the excess in the under bust area. I didn't like the line and the fit with the side piece split in two so I changed that piece as well. It all worked well on the mock up so it was time to get down to business.

Pretty felted seams.


The actual construction of this corset went rather quickly. I was determined to use stash items as much as possible so a lot of digging through various baskets, boxes, and various other containers happened. I didn't get nearly enough pictures of the work in progress. Before I knew it I had gotten through two seasons of Once Upon a Time on Netflix and was almost done.

I have to say I am rather proud of how quickly I got the busk in. It has been forever since I've sewn a corset and the busk used to scare the heck out of me but with this one I just did it.

 
 The grommets were a pain though. I still have the hand held grommet setter and I ended up with some sharp edges that I had to file down


There was some slight unevenness around the bottom that I had to cut into a nice shape before I could bind the bottom. But over all it all came together fairly well.


Digging through my box of odds and ends I found this dark purple bias tape. So I knew exactly what I was binding the bottom with. I had the exact same shade of purple satin ribbon from a baby shower gift that I used for the top along with some vintage lace from my vintage box of lace and trim. Next post will show the completed project.
I can't leave without showing my little helper up to her mischief. Those are her brother's feet in the back ground. He was supposed to be keeping her out of my sewing stuff... I eventually got my measuring tape back.

Tuesday, January 14, 2014

1910 Corset Mock Up Fixes

During my last fitting I pinned the trouble areas. Then I adjusted the pieces accordingly. 

Huge difference in the side. I can not imagine how this would even work, at least not as an underbust.

I ended up pinching the side piece in by over 4 inches. 

I marked in a way to stay as true to the general shape as possible. I also marked on the plastic pattern just in case it didn't work so I Could try something different.

New side with fixes.

New back with fixes. After this I also added to the hips a bit to get a somewhat straighter line. But based on my original try on, I know my hips will squish into line a bit. 


Much Better!!! Although to be completely honest, I still don't like the pattern as well as I would like. It just feels as if it needs more moving parts. I'm definitely not an expert at corsetry, in fact they really intimidate the heck out of me but this pattern just doesn't impress me. 
Next step is the plunge into the actual fabric. I'm so hoping that it turns out nice. I must say my system for sewing as a mom is working out really well. I've been binge watching Once Upon a Time with my middle son while my little one plays. I have a lot of interruptions but I'm getting some bonding time at the same time. I'll have to do a post about my sewing area in the future.